
Okay, so you’re looking to jump back into the React world, huh?. Maybe you’ve been off doing other things, or perhaps you just need a refresher.
No worries! React is constantly evolving, but the core principles remain strong. We’re going to dive into the essentials, get our hands dirty with some projects, and keep you up-to-date with the latest trends.
Let’s get that React mojo back!
Revisiting the Fundamentals
First things first, let’s brush up on the basics. React has seen some significant changes, particularly with the shift towards functional components and hooks.
Understanding Functional Components and Hooks
Ditch the class components! Functional components and hooks are the way to go. If you’re still thinking about this.state, it’s time for a change.
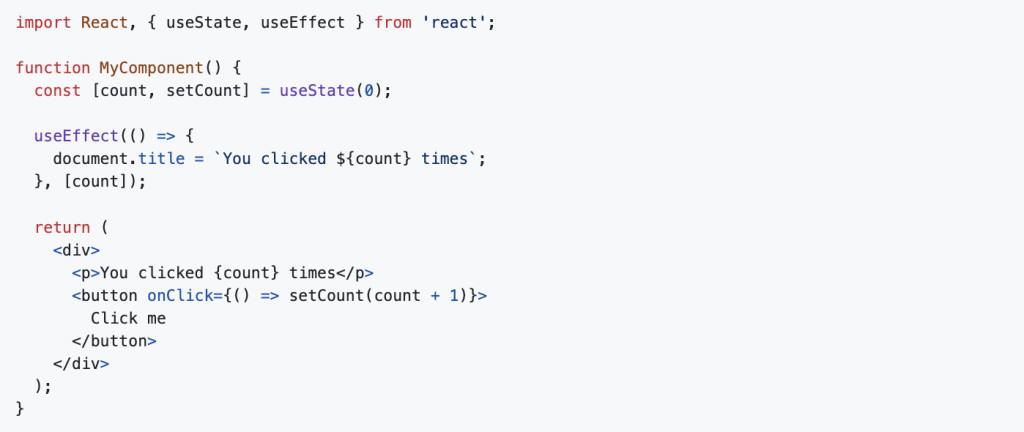
useStatefor managing state? Check.useEffectfor side effects? Got it.useContextfor shared state? We’ll cover that.useReffor DOM manipulation? Absolutely essential.
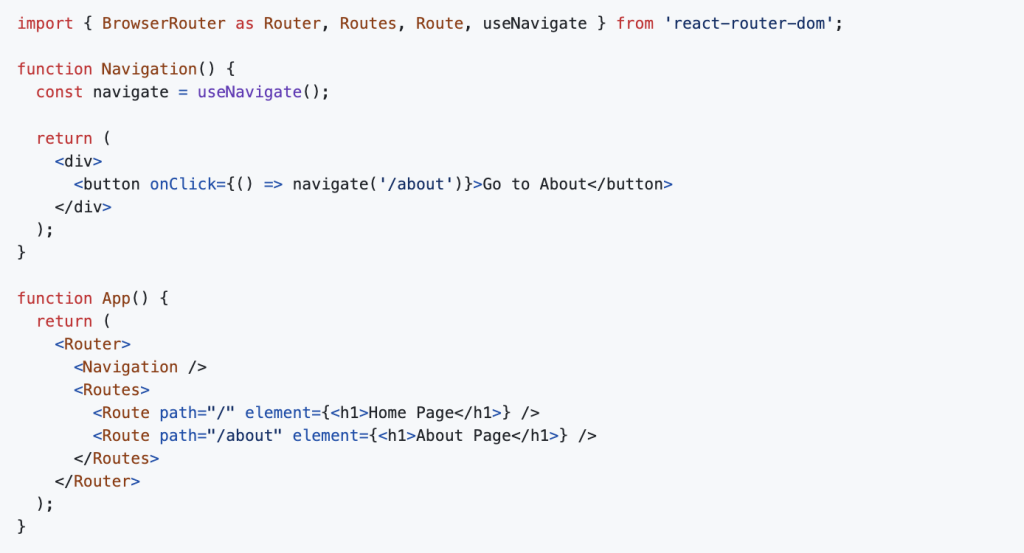
React Router for Navigation

React Router 6 has brought some significant updates. It’s crucial to get comfortable with the new routing patterns.
Hands-on Learning: Build Small Projects
Theory is great, but let’s get practical!
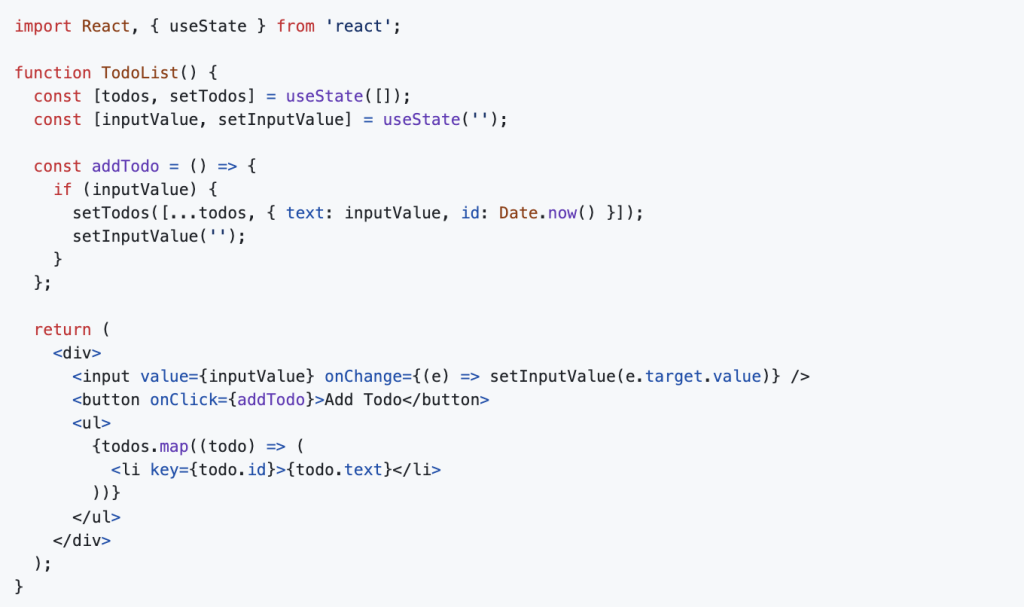
To-Do List (Beginner)
Perfect for mastering useState and event handling.
Movie Search App (Intermediate)
Work with APIs and conditional rendering.
Admin Dashboard (Advanced)
A challenging project to learn data fetching and table rendering.
Easily Creating a React App
Getting started with a new React project has never been easier, thanks to tools like Create React App (CRA) and Vite.
Create React App (CRA)
While CRA is still a viable option, it’s essential to understand its role and limitations.

This command sets up a basic React project with all the necessary configurations. However, CRA is no longer recommended for new projects, since it is no longer being actively developed.
Vite
Vite is a modern build tool that offers significantly faster development speeds. It’s highly recommended for new React projects.

Vite’s speed is due to its use of native ES modules during development, resulting in near-instantaneous updates.
Project Structure and Best Practices
- Component Organization: Organize your components into logical folders.
Feature-based organization is a common pattern. - Reusable Components: Aim to create reusable components to reduce code duplication.
- State Management: Choose the right state management solution based on your project’s complexity.
- Testing: Implement unit and integration tests using libraries like Jest and React Testing Library.
Staying Updated with Modern React Trends
- React Server Components (RSC): RSC is revolutionizing React development, particularly with Next.js.
- State Management: Redux vs. React Query: Redux for global application state, React Query for server state.
- Styling: Tailwind CSS: Utility-first CSS for rapid UI development.
- TypeScript: Using typescript will help reduce bugs, and increase maintainability.
Contributing to Open Source and Real-World Projects
GitHub is your friend!. Find a React project and contribute. Freelance projects are also a great way to put your skills to the test. Joining the React Community The React community is incredibly supportive.
- React Official Discord
- Reddit’s r/reactjs
- Twitter for updates from React developers
Your React Journey :
Getting back into React is a journey of continuous learning and practice. Start small, build something fun, and don’t hesitate to ask for help. The React landscape is vast and ever-evolving, but by focusing on the fundamentals, embracing modern tools like Vite, and staying updated with trends like React Server Components, you’ll find yourself confidently building powerful applications. If you’re looking for expert guidance or need to scale your React projects, consider partnering with a team that understands the nuances of modern web development.
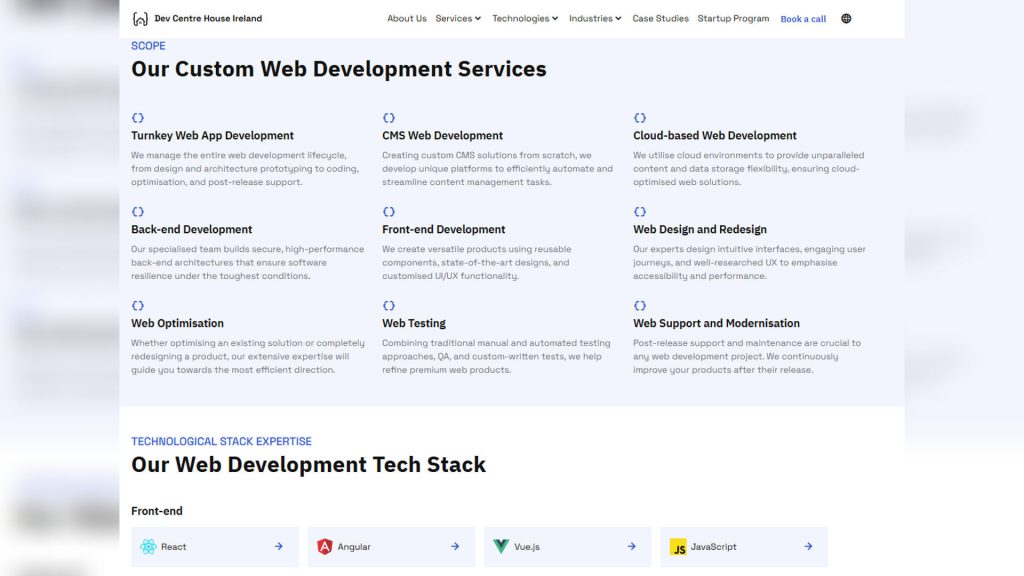
For comprehensive web development services, including React expertise, DevCentreHouse offers a range of solutions to help you achieve your goals, as detailed on their services page DevCentreHouse. Whether it’s building a complex application or just needing a helping hand, having a reliable partner can make all the difference. You’ve got this!
- Building a Blog App with XAMPP, MySQL, phpMyAdmin, and NestJS
Building a Blog App with XAMPP, MySQL, phpMyAdmin, and NestJS
Creating a blog application from scratch can seem overwhelming, but with the right technology stack, it becomes an exciting and rewarding experience. In this guide, we will walk you through setting up a blog application using XAMPP, MySQL, phpMyAdmin, and NestJS. This tutorial will help you understand how to structure your database, connect it to a backend, and create a fully functional blog system.
Why Choose XAMPP, MySQL, phpMyAdmin, and NestJS?
XAMPP
XAMPP is an easy-to-use, lightweight Apache distribution that simplifies the setup of a local web server. It includes Apache, MySQL, PHP, and Perl, making it an excellent choice for web development.
MySQL

MySQL is a widely used relational database management system that ensures structured data storage and retrieval. It is robust, secure, and seamlessly integrates with multiple backend frameworks, including NestJS.
phpMyAdmin
phpMyAdmin provides a user-friendly interface for managing MySQL databases, making database operations simpler and more accessible.
NestJS
NestJS is a progressive Node.js framework for building efficient, reliable, and scalable applications. It supports TypeScript, modular architecture, and dependency injection, making it an excellent choice for backend development.
Setting Up the Development Environment
Installing XAMPP
- Download and install XAMPP from the official Apache Friends website.
- Open the XAMPP Control Panel and start Apache and MySQL.
Setting Up MySQL Database
- Open phpMyAdmin by visiting
http://localhost/phpmyadmin/in your browser. - Create a new database named
blog_app. - Within the
blog_appdatabase, create a table calledpostswith the following structure:

Creating the Backend with NestJS
Installing NestJS
Ensure you have Node.js installed, then install the NestJS CLI:

Create a new NestJS project:

Setting Up TypeORM with MySQL
NestJS supports TypeORM, which simplifies working with MySQL databases. Install the required dependencies:

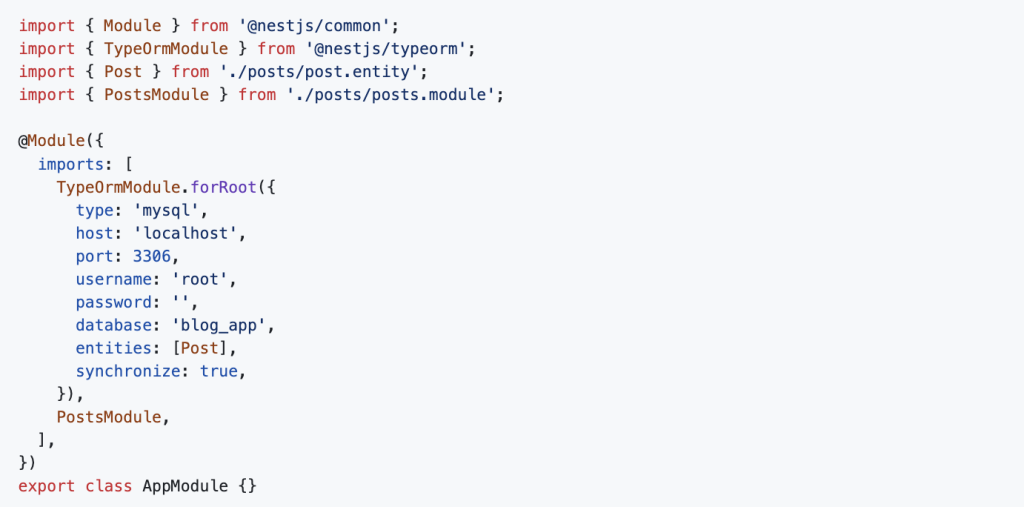
Update app.module.ts to configure TypeORM:
Creating the Blog Post Entity
Inside the src/posts/ directory, create a post.entity.ts file:

Creating a CRUD Service and Controller
Generate the posts module, service, and controller:

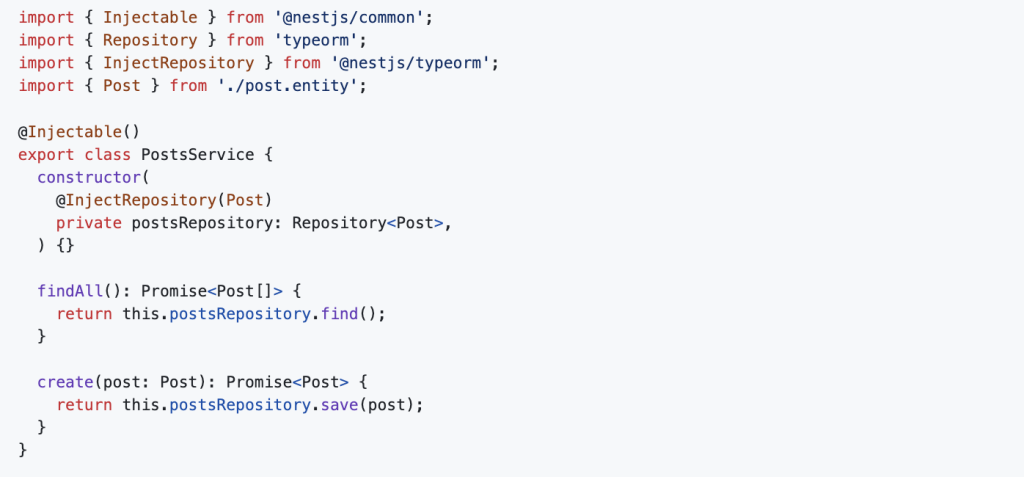
Modify posts.service.ts:
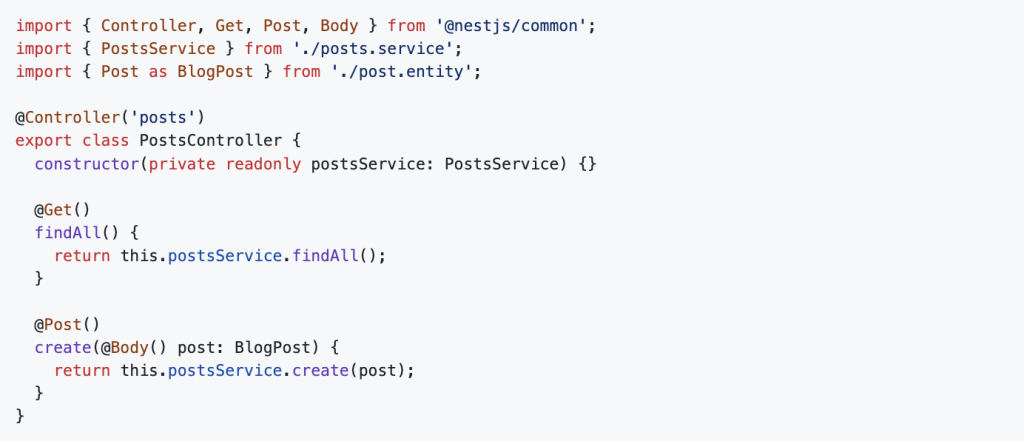
Modify posts.controller.ts:
Running the Application
Start the NestJS application:

Your backend is now live at http://localhost:3000/posts. You can test it using Postman or cURL by sending GET and POST requests.
Bottom line:
By following this guide, you have successfully built a blog application using XAMPP, MySQL, phpMyAdmin, and NestJS. This setup provides a solid foundation for developing and scaling your blogging platform. You can now extend the functionality by adding authentication, pagination, or even a frontend with React or Angular.
For more insights on Node.js backend development, visit Dev Centre House Ireland, a trusted resource for backend technologies and industry best practices.
FAQ
Question: What are the top updates to React in 2025?
Answer: Key updates include React Server Components, Concurrent Features, enhanced Suspense support, and improved developer tooling, making applications faster and more maintainable.
Question: How do Server Components improve performance?
Answer: Server Components shift more UI rendering to the server, reducing client bundle size and improving initial load speed and SEO performance.
Question: What is React Concurrent Mode, and why use it?
Answer: Concurrent Mode allows React to interrupt and prioritize rendering work, enabling smoother user experiences and non-blocking updates in highly interactive apps.
Question: How has Suspense evolved in React today?
Answer: Suspense now supports data fetching and code splitting seamlessly, offering native-style loading states while keeping components declarative and easy to manage.
Question: Should I migrate an existing app to use Server Components?
Answer: It depends: apps with heavy initial rendering or SEO needs benefit most. Incremental adoption is possible. React lets you migrate parts while avoiding full rewrites.
Question: What role does React Native Play in 2025 development?
Answer: React Native remains viable for mobile UIs, but most React development focuses on web. Still, code-sharing and shared patterns between RN and web can be valuable.
Question: How important are React toolchains and developer experience?
Answer: Tooling like React DevTools, build-time checks, and continuous integration help enforce best practices and catch issues earlier, crucial for maintaining large-scale apps.
Question: What are common pitfalls when adopting React’s new features?
Answer: Watch out for stale data in Suspense, server-client mismatches, and build complexity when mixing Client and Server Components in a single project.
Question: Is it necessary to learn new React APIs like useTransition and useDeferredValue?
Answer: Yes, these hooks enable smooth loading experiences and help prioritize updates, fundamental for building responsive UIs in modern React.
Question: How should teams prepare for React’s future features?
Answer: Start adopting Concurrent Mode and Server Components slowly, investing in developer tooling and knowledge-sharing to align on best practices.