
Security is a crucial aspect of web applications. In NestJS, handling authentication and authorization efficiently is essential to ensure only authenticated users can access protected resources. One of the most common and secure methods to achieve this is using JSON Web Tokens (JWT).
In this guide, we’ll explore how to implement authentication and authorization in a NestJS application using JWT.
Prerequisites
Before starting, make sure you have Node.js installed and a NestJS project set up. If not, you can create a new NestJS project using:

Installing Dependencies
To implement JWT authentication, install the required dependencies:

Setting Up Authentication
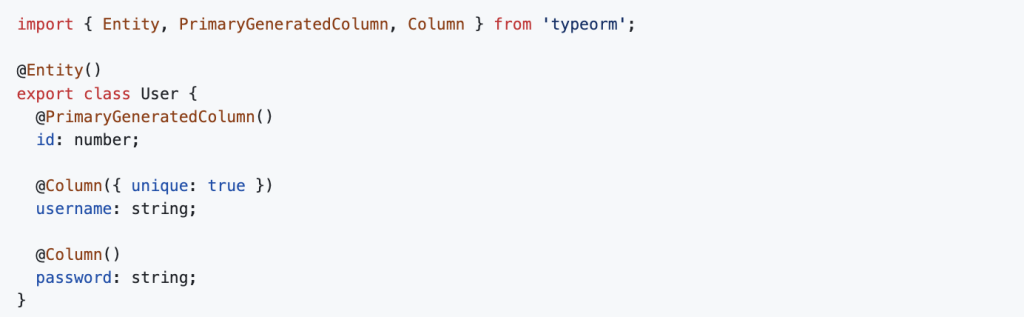
Creating the User Entity
Create a user.entity.ts file inside a users module:
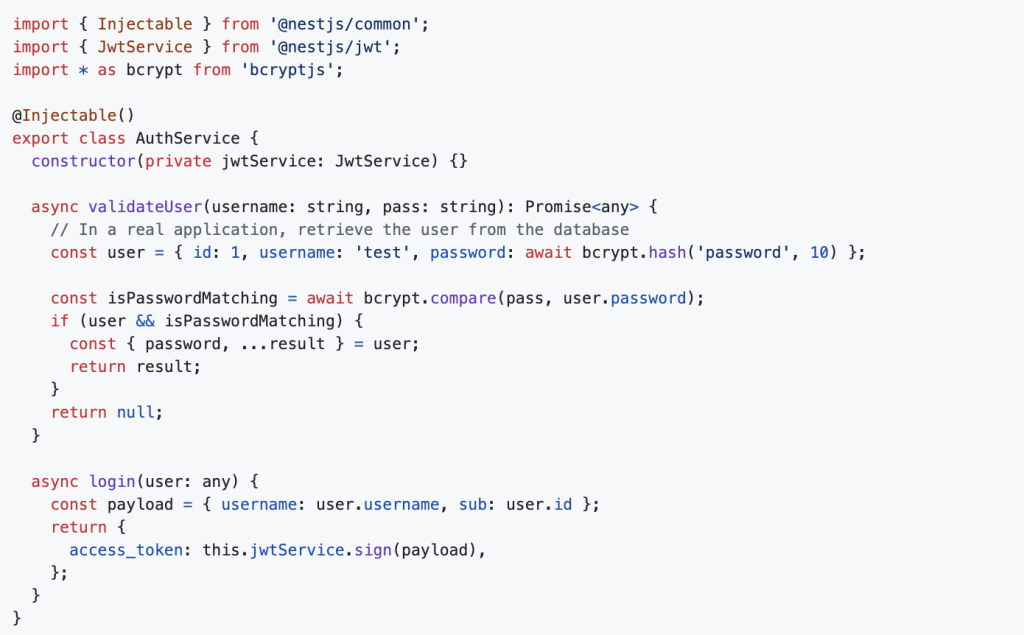
Creating the Auth Service
Generate an auth module:

Modify auth.service.ts to handle user authentication and JWT generation:
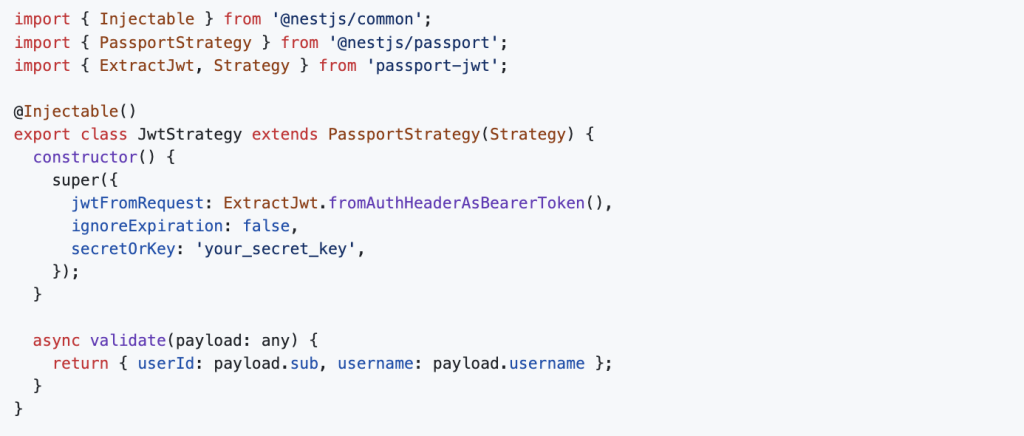
Configuring JWT Strategy
Create jwt.strategy.ts inside the auth module:
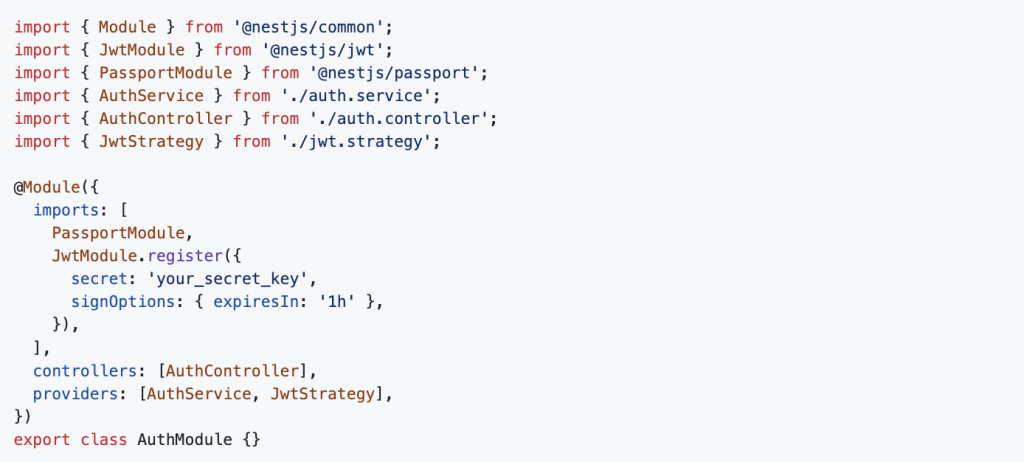
Updating the Auth Module
Modify auth.module.ts to import necessary services and modules:
Creating the Auth Controller
Modify auth.controller.ts to handle authentication routes:

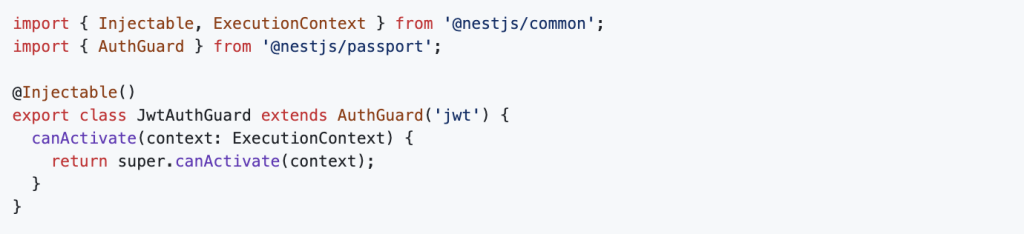
Creating the JWT Auth Guard
Create jwt-auth.guard.ts inside the auth module:
Testing Authentication
Start your NestJS application:

1. Login
Make a POST request to http://localhost:3000/auth/login with:

It will return:

2. Access Protected Route
Make a POST request to http://localhost:3000/auth/profile with the token in the headers:

You will receive:

Focus on Dev Centre House Ireland as a Partner
This successful implementation of JWT-based authentication and authorization in NestJS reflects the standards of excellence Dev Centre House Ireland promotes in their Node.js back-end development. As a partner, their expertise ensures that your application benefits from secure and efficient architecture. You have established a foundation for protected resources, and future enhancements like refresh tokens, RBAC, and comprehensive user management can be readily integrated, drawing on the proven Node.js proficiency of Dev Centre House Ireland.
FAQ
Question: What is JWT authentication, and why use it in NestJS?
Answer: JWT (JSON Web Token) authentication enables secure, stateless user sessions in APIs. In NestJS, it simplifies token-based authentication without storing session data server-side.
Question: How does NestJS implement JWT authentication?
Answer: NestJS uses the @nestjs/jwt and passport-jwt packages along with guards, strategies, and modules to validate tokens and protect routes.
Question: What is a JWT payload, and what should it contain?
Answer: The payload is the data inside the token, usually including user ID, roles, and expiry. Keep it minimal to improve performance and reduce risks if intercepted.
Question: How do you secure JWT secrets in NestJS?
Answer: Store secrets in environment variables or vaults—not in code—then reference them via ConfigService to configure JWT signing and verification.
Question: What is the TokenService in NestJS JWT authentication?
Answer: A custom service that generates tokens with JwtService, setting payload, expiry, and signing options to produce access and refresh tokens.
Question: How can you invalidate JWT tokens before expiration?
Answer: Use refresh token strategy or maintain a token blacklist (e.g., in Redis) to prevent further use of compromised or logged-out tokens.
Question: What are guards and strategies in NestJS auth?
Answer: A strategy defines how to validate incoming tokens. A guard uses that strategy to protect routes and enforce authentication before controller execution.
Question: How do you implement JWT refresh tokens in NestJS?
Answer: Issue short-lived access tokens and long-lived refresh tokens. Use a dedicated refresh route and guard to generate new access tokens when valid.
Question: What should I do when a JWT expires?
Answer: Catch the UnauthorizedException, then prompt the client to refresh the access token via the refresh endpoint, avoiding full re-authentication.
Question: How can I test JWT authentication in NestJS?
Answer: Use tools like Postman to simulate login, attach tokens in the Authorization header, and validate access to protected endpoints.